
In today’s digital world, social media is just non-negotiable for businesses. If you’re serious about growing your WordPress site, you can’t ignore social media. It’s a must-do.
Sure, everyone is chasing that Google traffic, and SEO is super important. After all, organic traffic is one of the best ways to get consistent, high-quality customers.
But honestly, social media is still just as important!
Think about it – it’s another whole avenue to connect with REAL people. Plus, it’s fantastic to build a brand that people recognize and trust. And let’s be real, who doesn’t want that?
But here’s what we always hear from WordPress users: social media management is a time drain.
On top of that, scheduling posts across different platforms can be super repetitive. So, it’s easy to see why so many people are not too focused on social media marketing.
It might not be so bad if it were just about managing one or two social media platforms.
But these days, you’ve got to be on multiple platforms to really get noticed, such as Facebook, X (formerly Twitter), Instagram, you name it.
Now, what if you could handle all social media scheduling, management, and marketing from your WordPress dashboard? Imagine the time you’d save if you could just automate your social media posting.
Remember, sharing your social media content is one of the best ways to get people talking and engaging with your site. Besides that, it’s a fantastic way to drive traffic and really build that connection with your audience.
That is why at IsItWP, we’re constantly looking for the best WordPress social tools to help users like you.
We’ve been in the WordPress space for years, testing countless plugins for both our websites and client projects.
So, we know what works and what doesn’t.
Before we recommend any plugin, theme, or hosting, we test it ourselves. We do not rely on online reviews and a quick look at the features page.
And today, through this review, we want to share our experience with one of our favorite social media scheduling WordPress plugins: ClickSocial.
So, as we dive into this ClickSocial review, we’ll share how it can ease your workload and improve your online social media presence based on our experience.
To help you easily navigate this review, we have divided it into different sections. You can quickly skip to any section by selecting the links below.

You know, it’s interesting how many great WordPress plugins come from teams that already nailed something else in the WordPress world.
Take ClickSocial, for example. It’s actually made by the same folks who created Smash Balloon.
And if you’ve been around WordPress for a while, you’ve probably heard of Smash Balloon. They are the team behind some of the best social media feed plugins.
For Example;
With Smash Balloon, you can pull in feeds from different social media accounts and display them on your site.
On top of that, you can create different feeds and add them to different pages. Or create a social wall, where you place feeds from different social media platforms on the same page.
Plus, Smash Balloon is super versatile. You can customize each feed to fit your branding and business website theme.
We’ve used it ourselves on different projects, and it’s always been the best choice for embedding social feeds.
Check out the Smash Balloon review here to learn more.
But here’s the thing, even though Smash Balloon is awesome for feeds, the team realized something was still missing for WordPress users.
There are tons of social media management tools out there, right? But a lot of them are just… complicated.
They’re not really made for the everyday WordPress user who just wants to easily share their content and grow their social media presence without getting overwhelmed.
So, in true Smash Balloon style, they went back to their core idea: keep it simple. And that’s how ClickSocial was born.
ClickSocial is designed specifically for WordPress users who want an easy way to actually engage with their social media audience and get more traffic back to their website from social media.
It comes packed with features to make this easier. For example, you get features like one-click link embeds, which are super handy.
Plus, it allows you to upload WordPress media files directly to social media, streamlining content creation.
And here’s a cool one: automated content revival.
This helps you keep your social media presence active even when you’re busy.
The best part?
All of this is right there in your WordPress dashboard. No more jumping between different platforms – everything’s in one place.
Ultimately, ClickSocial is trying to bridge that gap between social media and business owners. They want to make social media not just an afterthought, but a real, core part of your marketing strategy.
Their main strength is helping you keep your content alive and circulating on social media.
Let us explain more with this Clicksocial review.
ClickSocial Review: Is This the Right Social Media Management Tool for You?
So, in this ClickSocial review, we will explain exactly how it can help you with social media scheduling and management.
We’ll go through each section to show you everything you need to know about ClickSocial and if it’s the right tool for you.
Let us start with installation and set up.
Installation and Set Up
If you want to try ClickSocial, you can actually start with their free version. You can find it in the WordPress plugin repository, totally free to download and try out.
You see, even the free version of ClickSocial is very powerful.
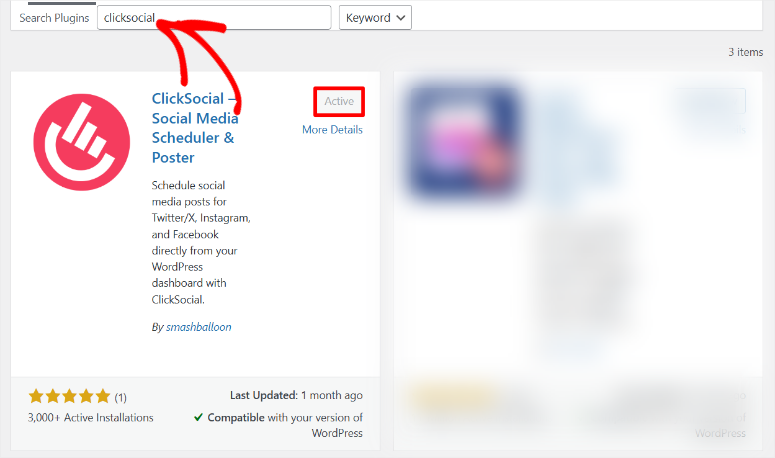

It lets you connect your social media accounts and get a feel for scheduling posts. Added to that, it even gives you a calendar view, which is super handy for getting a bird’s eye view of your social media strategy.
But for this review, we wanted to really put ClickSocial through its paces and test out all the bells and whistles.
So, we’re using the ClickSocial pro version.
And the cool thing is, you can also kick things off with a 14-day free trial of the pro version yourself.
To start, head to the ClickSocial official website and select a plan. Once you sign up for the trial, the first thing you’ll see is that you get redirected straight to your ClickSocial account dashboard.
And let me tell you, the ClickSocial dashboard makes a great first impression. It’s really beautiful and modern-looking. Everything is laid out in a way that’s easy to find and navigate.
You know how some plugin dashboards can feel cluttered or confusing? Well, ClickSocial is definitely not like that. In fact, from our experience, this one is surprisingly detailed as far as plugin dashboards go.
On top of that, you’ll notice that a lot of the options you get in the WordPress plugin are actually mirrored here in the dashboard.
So, if you ever feel like managing your social media from within WordPress is overwhelming, you could easily switch over to the ClickSocial dashboard and handle things from there.
But let’s get to the main point: How to connect ClickSocial to your WordPress website.
And the good news is, they’ve made this process incredibly straightforward.
Right on the ClickSocial dashboard’s homepage, they’ve got a walkthrough that guides you on how to connect your website. No need to wade through pages of documentation or watch lengthy video tutorials.
It’s all right there, super clear.
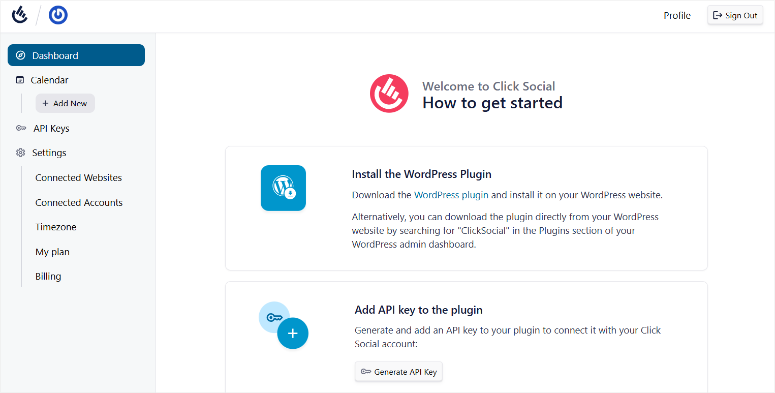

The first step in the walkthrough is to select WordPress Plugin under the “Install the WordPress Plugin” tab. After that, it’s time to head over to your WordPress dashboard to actually install the plugin.
To do this, just go to Plugins » Add New Plugin, like you normally would when installing any plugin.
Then, you upload the ClickSocial plugin file that you downloaded from their dashboard. Once it’s uploaded, just hit “Install” and then “Activate” the plugin.
If you face any issues, check out this post on how to install WordPress plugins.
Okay, so after you’ve activated ClickSocial, you’ll notice a brand new menu option in your WordPress sidebar, labeled “ClickSocial.” Select it to go straight to the Onboarding page.
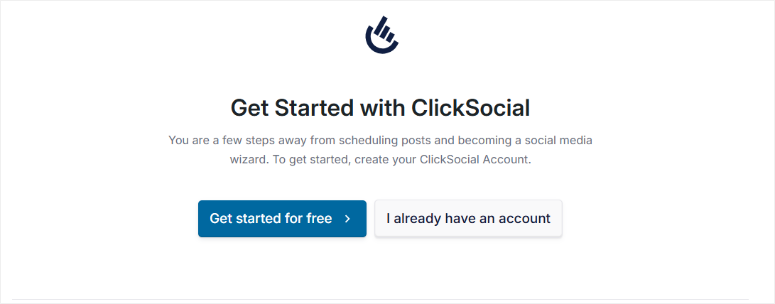
Now, on this onboarding page, you’ll see an option to create a new account. This is handy if you just downloaded the free version from the WordPress repository and haven’t signed up yet.
But since we already have our pro account and are all signed up, we will select “I already have an account.”

Now, for the next step, you need to jump back over to your ClickSocial account dashboard. Here, look for the “Add API Key to the Plugin” section. You’ll see a button in there that says “Generate API Key.”
Select that to create a new key. On the next screen, hit the “+Add New” button at the top. After this, a popup asks you to name your API key.
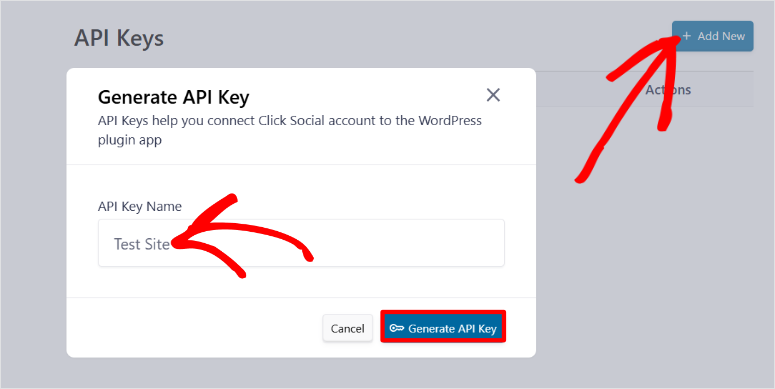

If you plan on using ClickSocial on multiple websites, it’s a good idea to name it something you’ll easily recognize and associate with each site.
Once you’ve named it, ClickSocial will generate your API key. Copy that key. Then, head back to your WordPress dashboard and that ClickSocial onboarding page we were just on.
You’ll see a text bar here – paste the API key and then select “Connect.”
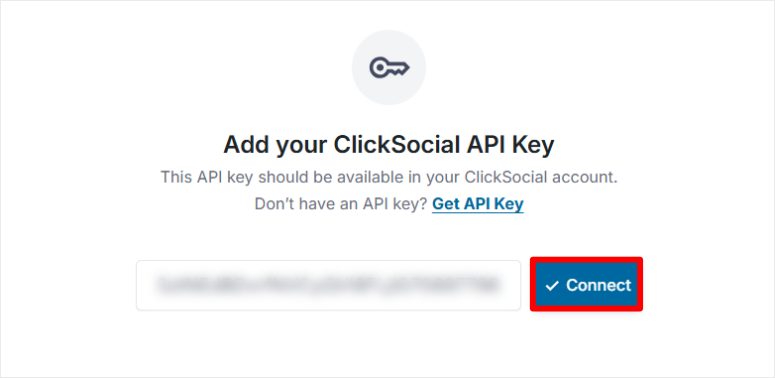

And just like that, you have connected ClickSocial to your WordPress dashboard.
After this, you will immediately be taken to the “Get Started” page in your WordPress dashboard. What’s really nice about this “Get Started” page is that they use accordions for each setup step.
These are sections that you can expand and collapse. As a result, it makes setting up the plugin feel guided and easy because it breaks everything down into manageable chunks.
So, the next step is to select “Connect Social Accounts” in the accordion. After it expands, select the “+ Add Account” button.
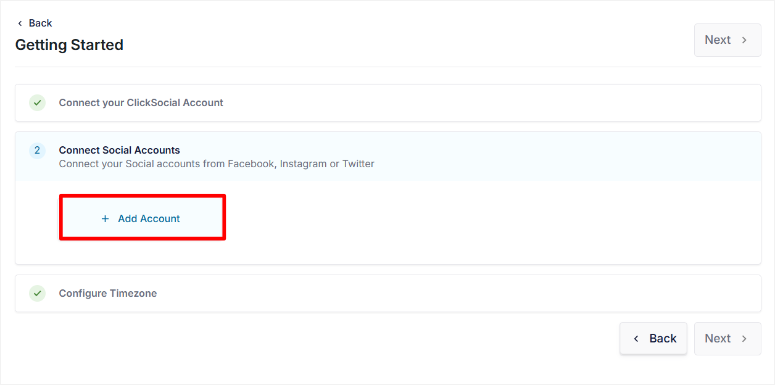

Here, choose between social media platforms: X (what used to be Twitter), Facebook, or Instagram.
For this example, let’s go with Facebook. When you select “Connect to Facebook,” it redirects you to a Facebook-ClickSocial sign-in page.
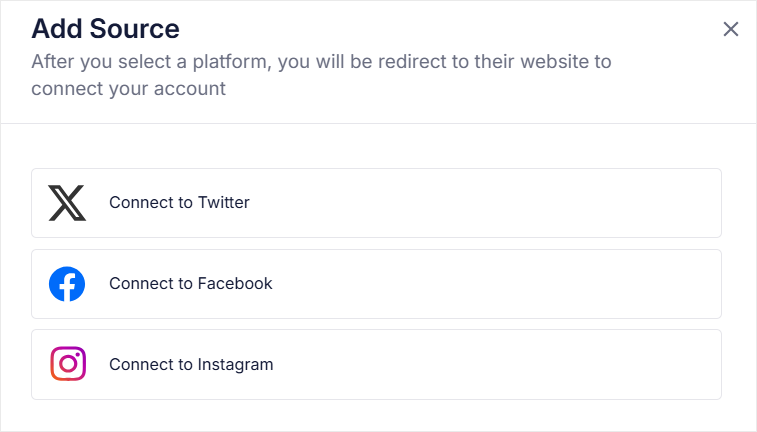

Here, enter your ClickSocial login details and hit “Login.” In the popup window, select which Facebook pages you want to grant ClickSocial access to.
Then, on the next screen, choose the businesses you want to give ClickSocial access to. Finally, on the last popup, just review the permissions you’re granting and save your settings.
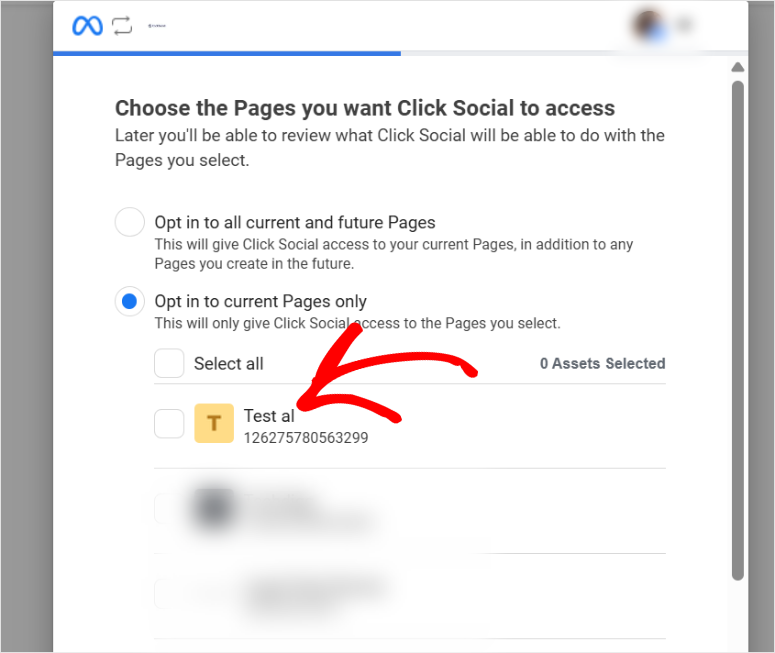

After all that, you’ll be redirected right back to your WordPress dashboard. And if you want to add more social media accounts, select “Add account” again and repeat the process for other platforms.
Once done, simply select Next.
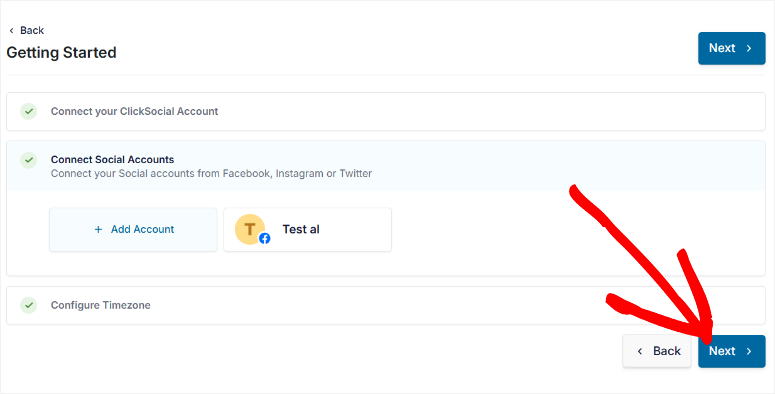

Once you’ve connected all your accounts, hit “Next” at the bottom of the “Connect Social Accounts” screen. This opens the “Configure Timezone” section.
This is important because the timezone setting makes sure all your scheduled posts go out at the right time, both for you and for any team members you might have.
You get two timezone options here. You can either “Use ClickSocial’s connected account timezone” or “Use WordPress site timezone.” Choose whichever one works best for you and your team.
Once you’ve selected your timezone, just hit “Finish Setup.”
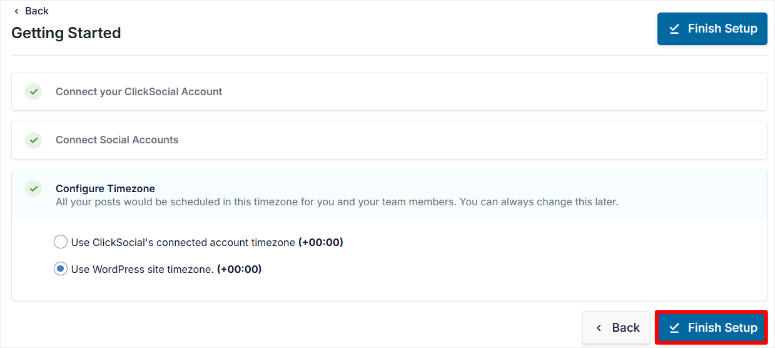

And that’s it! The setup is complete, and ClickSocial is ready to schedule social media posts.
After the setup, ClickSocial even gives you a quick tour of the dashboard within WordPress. And we actually liked this onboarding tour.
You see, there’s a slight delay before the “Next” button becomes clickable on each step. At first, we thought it was a gimmick, but then we realized it’s a smart move.
It makes sure you actually read the information in each step of the tour instead of just clicking through without paying attention.
Apart from that, you will notice what we spoke about earlier.
The WordPress ClickSocial interface is similar to the actual ClickSocial dashboard. So, there’s no learning curve if you switch between WordPress and the external dashboard.
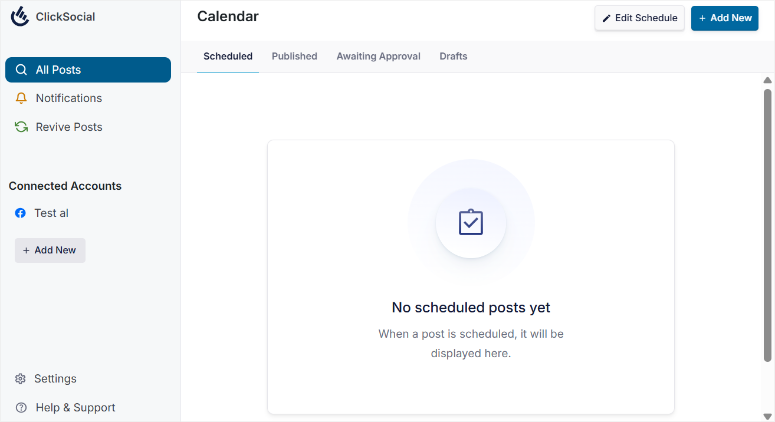

As a result, it feels consistent and user-friendly.
Now, let us look at how to customize ClickSocial.
Customization
Alright, so you’ve got ClickSocial installed and connected to your WordPress site – that’s awesome!
But now comes the fun part: making it work exactly how you want it to. You know, customizing it to fit your workflow and team.
To get to the customization options, select “Settings” at the bottom of your ClickSocial menu in your WordPress dashboard.
One of the first things you might want to customize, especially if you’re working with a team, is user access. So, in the settings menu, navigate to “Workspace” and then Members.
You’ll see a list of any team members you’ve already added and their current access levels. If you want to bring more people on board to help with your social media management and scheduling, just hit the “Invite” button.
Beyond team access, ClickSocial also lets you customize “Quick Share” options.
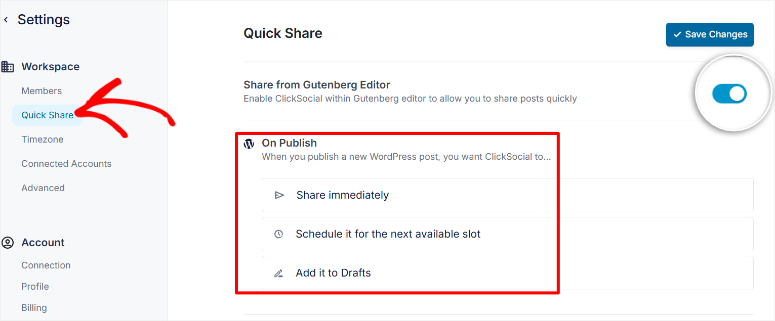
Look for “Quick Share” under Settings, and you’ll see a toggle button to activate “Share from Gutenberg Editor.” Flipping this switch to “on” allows Quick Share.
You see, enabling “Share from Gutenberg Editor” means you can share your posts directly to social media from the WordPress block editor as you write them. Talk about streamlining your content creation process!
But ClickSocial doesn’t stop there. They go a step further with “On Publish” settings.
Head over to the “On Publish” section in Settings, to decide exactly what you want ClickSocial to do every time you publish a new post in WordPress.
You get the following options:
- Share immediately: ClickSocial shares a social media post as soon as you hit the publish button in WordPress.
- Schedule it for the next available slot: Select this option if you want to add the social media post to your schedule queue. This is great for keeping your social media feed consistently active.
- Add it to drafts: This option gives you even more control. It adds the post to your ClickSocial drafts, so you can manually schedule it later whenever you want.

For even more fine-tuning, there’s the “Advanced” settings section. Here, you find a toggle button that lets you “Make Short Links default to Post Links.”
This ensures that the links in your social media posts are short links by default. This helps you create better looking social media posts, improving engagement.


Added to that, using post links can also improve tracking. It can sometimes give you more accurate analytics on where your social media traffic is coming from.
And what if you want to speed up social media scheduling?
ClickSocial has this really neat “slots” feature. Think of “slots” as predefined times in your schedule when you want your social media posts to go out.
Customizing these slots can seriously streamline your scheduling and posting routine.
To customize your slots, go to “All posts” in your ClickSocial menu in WordPress and then hit “Edit Schedule.” Then, select the social media account for which you want to customize scheduling slots.


This will open up a table showing you the default days and time slots that ClickSocial has set up for that account. To customize these, just use the checkboxes to select the specific days you want to adjust time slots for.
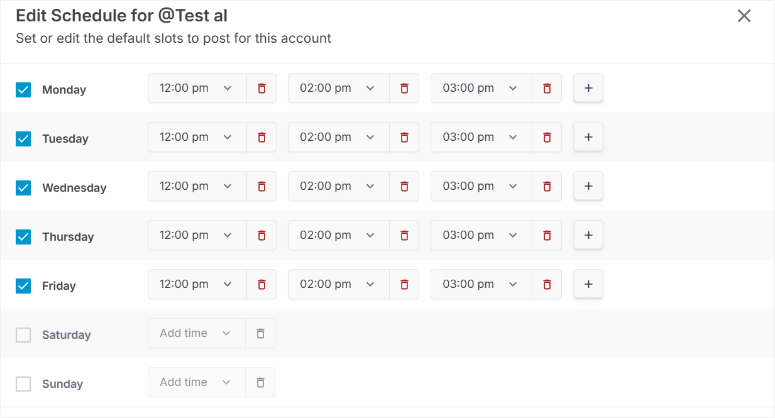

Then, use the dropdown menus to customize the exact time slots for those selected days. And if you need even more time slots in a day, no problem – use the plus button to add extra slots as needed.


As you see, with ClickSocial, it is all about setting up a schedule that works perfectly for your business, content, and your audience.
Next, let us see how easy it is to use Click Social.
Ease of Use
Now that we’ve explored how you can customize ClickSocial to fit your needs, let’s talk about something super important: how easy is it to use every day?
Because, you know, even the most feature-packed plugin isn’t great if it’s a pain to navigate. And with ClickSocial, right from the get-go, you can tell they’ve put a lot of thought into making it user-friendly.
ClickSocial’s dashboard is super easy to navigate, with tabs like Schedule, Drafts, and Published right at the top so you can quickly check the status of your posts.
On the left sidebar, you’ll find even more tools like Connect Accounts, All Posts, and a handy Revive Posts feature. Everything’s laid out clearly, so it’s easy to find what you need with just a click.
Everything you need is neatly organized and within easy reach, making it easy to use.
But to show you how easy ClickSocial is, let’s create a social media post.
To start, look for the “Add New” button at the top of the page and select it.


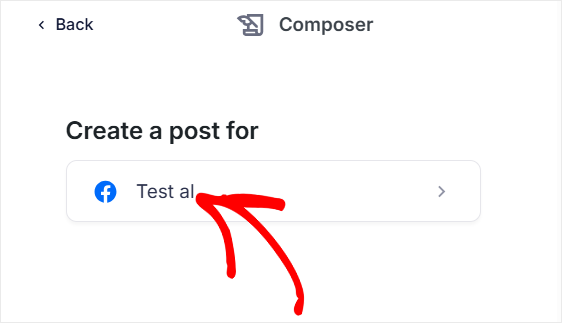
After this, a list of your connected social media accounts pops up. In our example, we’ve only connected our Facebook account so far, so that’s the only one we see listed.
So, we will select Facebook to open up the social media post editor.

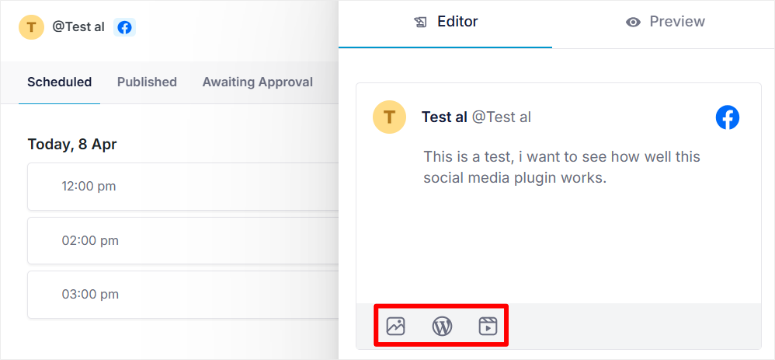
Next, type the content you want for your social media post directly into the editor. The interface feels similar to many social media platforms, making it feel familiar.
But, if you want to share content from a WordPress post and don’t want to retype everything, ClickSocial has you covered. Underneath the editor, you’ll see a little WordPress icon.
Hit this to open your WordPress posts library. Select the WordPress post you want to share on social media, and ClickSocial will import it right into your social media post editor.
And of course, social media is visual, right?
So, ClickSocial makes it easy to add images and videos too. You’ll see an image and a video icon next to that WordPress icon.
Select either to access your WordPress media library and choose the perfect visuals for your social media post.

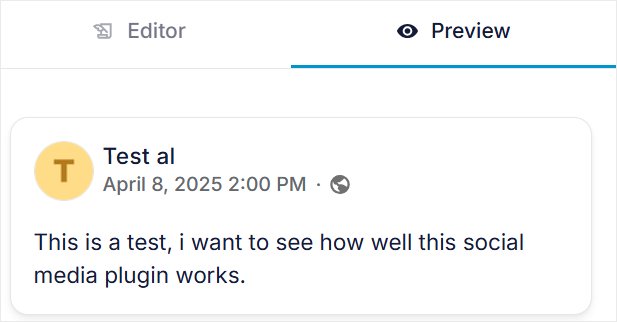
Once you’ve added your content and visuals, you can preview it before it goes live.
You’ll see the Preview tab at the top of the editor, right next to the “Editor” tab. Select it to see exactly how your post will look on the social media platform.
This makes sure everything looks just right before you publish.

If you’re happy with your preview, you’ve got a few options. If you’re not quite ready to publish yet or want to come back and tweak it later, just hit the “Save Draft” button.
But if your post is good to go and you want to publish it immediately, select the “Publish” button.
Now, if you want to schedule your social media post for a later time, that’s also incredibly simple. Next to the “Publish” button, you’ll see a dropdown next to Now.
Select this dropdown to open a calendar. In the calendar, you can either pick from the available time slots or Schedule for Custom Time to choose a specific date and time.
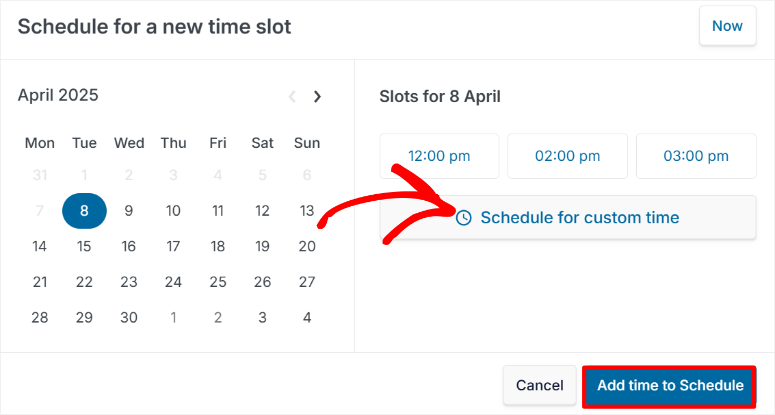

It gives you a lot of flexibility when your posts go out.
And here’s a cool part: you can schedule multiple posts for the same day and for days, weeks, or even months into the future.
So, how do you do this?
ClickSocial has a tab system next to the social media editor to help you schedule your posts.
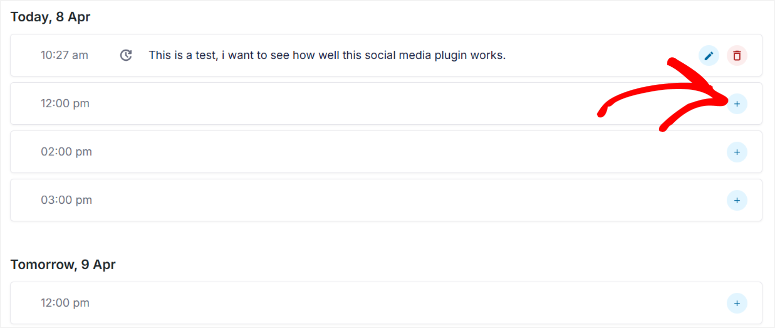

Select a day tab, and you’ll see the available time slots.
You can then create social media posts for those slots the same way we did above. Plus, these time slots have infinite scroll, so you can keep scheduling posts as far into the future as you need.
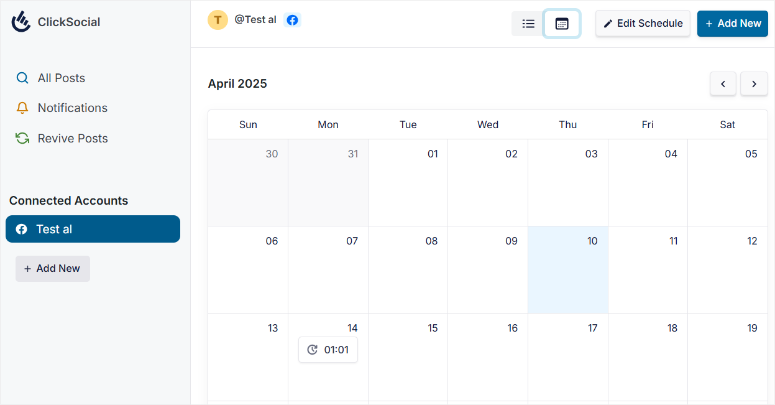
But, if you prefer a calendar view over the list format for scheduling, ClickSocial has you covered there too. At the top of the page, you’ll see a calendar icon. Select it to switch to “Calendar Mode.”
In Calendar Mode, you get a visual calendar of your entire social media schedule.
This makes it even easier to visualize your whole social media strategy at a glance and see how your posts are spaced out over time. It’s a really helpful way to get a big-picture view of your social media plan.

So, as you can see, ClickSocial really does make managing and scheduling your social media feel much less daunting.
From the clearly laid-out dashboard to the intuitive post editor and flexible scheduling options, it’s designed to be user-friendly for WordPress users of all skill levels.
Now, apart from the tools we discussed above, let us look at some of the supporting features of ClickSocial.
Features
So, we’ve seen just how user-friendly ClickSocial is. But ease of use is only part of a good WordPress social media plugin.
ClickSocial also comes with helpful features that support its main tools. Let’s explore some of these powerful capabilities.
1. Revive Posts: Give Your Old Content New Life
Beyond just easy social media posting, ClickSocial offers ways to make your social media strategy smarter.
First up, let’s talk about this clever feature Revival Posts.
It lets you automatically re-share your older WordPress posts on social media. You can set up specific time slots and days to reshare the post.
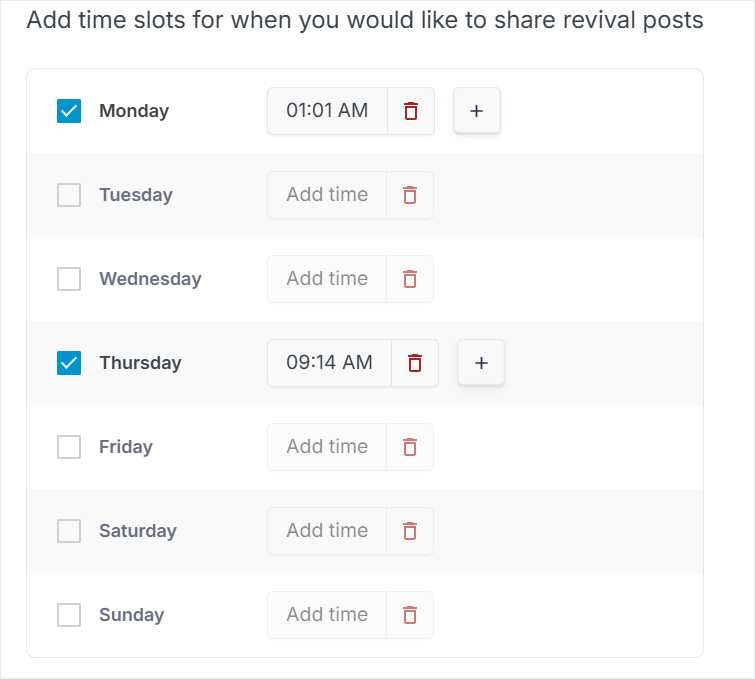

Think about it. You’ve probably got blog posts that are still relevant but buried in your archives. Revival Posts help you bring that older content back to life.
The best part is that you can choose specific WordPress posts to automatically share again.
Maybe you want to boost views on older posts or re-engage your audience with popular content, ClickSocial can help you.
Apart from that, ClickSocial lets you filter which posts to revive. You can filter by date, tags, and even author. This helps you target exactly the kind of content you want to re-share.
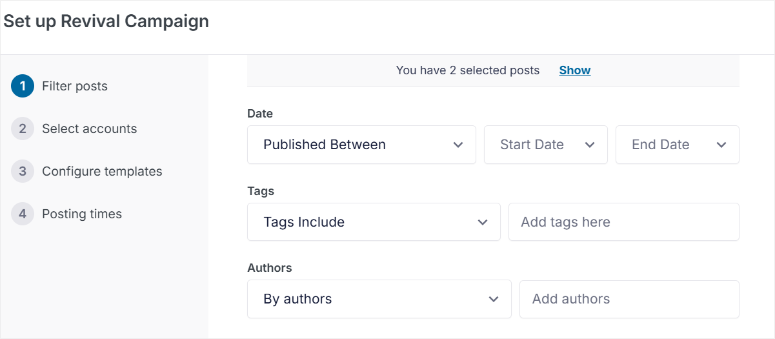

And to really automate things, you can use “Dynamic Variables” for your revival posts. These let ClickSocial automatically create social media posts using elements from your WordPress content.
You can use variables like Post Title, Excerpt, Short Post link, Post link, and even Categories as Hashtags.
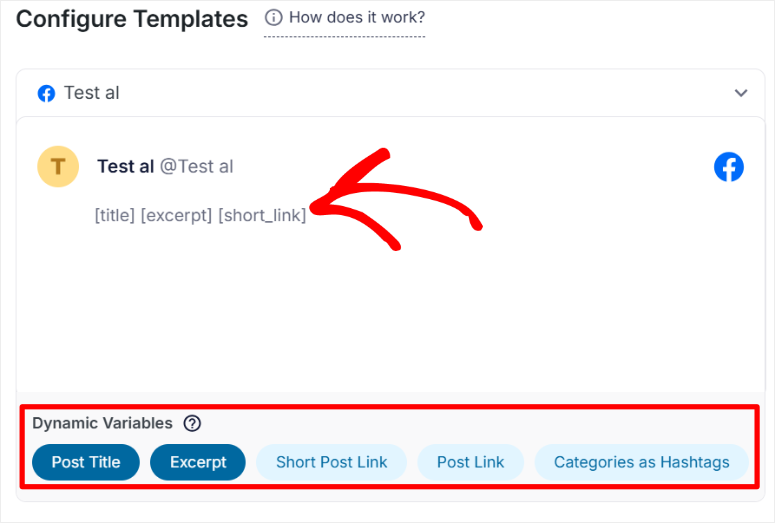

Basically, Dynamic Variables give you everything you need to fully automate social media posts from your old content.
You just set it up once, and ClickSocial keeps your evergreen content circulating. You can even select specific days and time slots for when you want these automated Revival Posts to be shared.
2. Gutenberg Builder Integration: Share Directly From Your Editor
Now, streamlining your workflow is key, and ClickSocial understands that.
Let’s look at how they make content sharing even easier with “Gutenberg Builder Integration,” also known as the “Quick Share” feature.
Remember when we enabled “Quick Share” in the Customization section?
Well, let us discuss it in detail.
Quick Share lets you share your content directly from the default WordPress Gutenberg editor. This makes using ClickSocial incredibly convenient.
It fits right into your content creation workflow. It’s efficient because you don’t have to leave your post to share it. Plus, it streamlines your whole content creation process, keeping everything in one place.
To use this feature, you first need to ensure you’ve enabled it in the settings, as we discussed. Then, just open up any WordPress post in the Gutenberg editor.
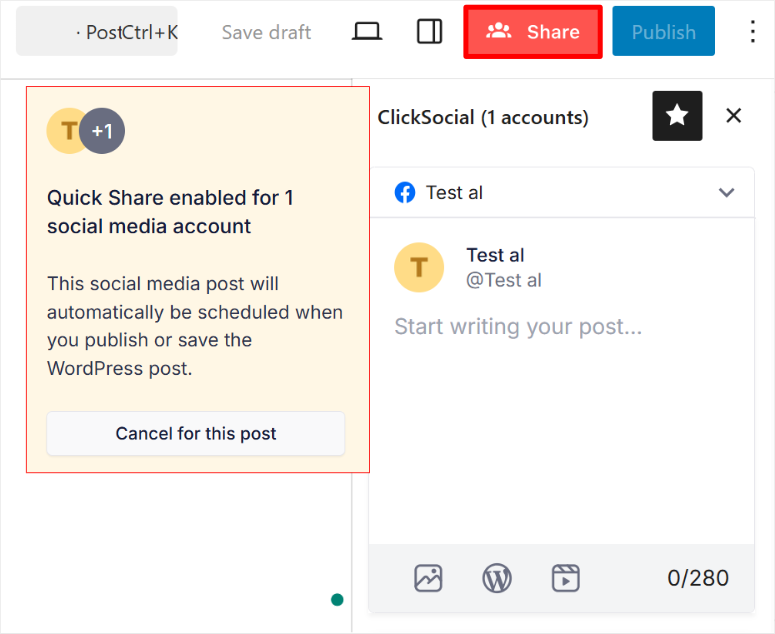
After this, look next to the “Publish” button, and you’ll see a new “Share” button.
Here, select the “Share” button, and you’ll see social media sharing options pop up. A list of your social media accounts will be there, arranged in easy-to-use accordions.
Just select the accounts you want to share to. You can even customize your social media post right there in the editor, just like we showed you in the “Ease of Use” section.
And the best part?
When you hit “Publish” or “Save” on your WordPress post, your social media post is automatically scheduled too. It’s all synced up.
If you decide you don’t want to share a particular post on social media, no problem. Just hit the “Cancel For this Post” button in the Quick Share options.

3. Notifications: Stay in the Loop with Your Social Media Activity
Keeping track of all your social media posts can be tricky, right? ClickSocial Notifications feature helps you stay organized.
This gives you a clear overview of all your social media post activity. In Notifications, you can quickly see posts To Review, Posts Shared, Posts in Draft, and a lot more.


They even include a filter that narrows down the notifications, so you can quickly find what you’re looking for.
4. Submit and Approve Posts: Teamwork Makes the Dream Work
Maintaining brand consistency and quality is a high priority for those working in teams. ClickSocial has also thought about team collaboration with the “Submit and Approve Posts” feature.
This feature is all about team collaboration and quality control.
This review feature lets you set up a workflow where social media posts must be reviewed before they go live. As a result, it ensures that everything that gets posted aligns with your brand voice and standards.
And it’s not just about approving or rejecting posts.
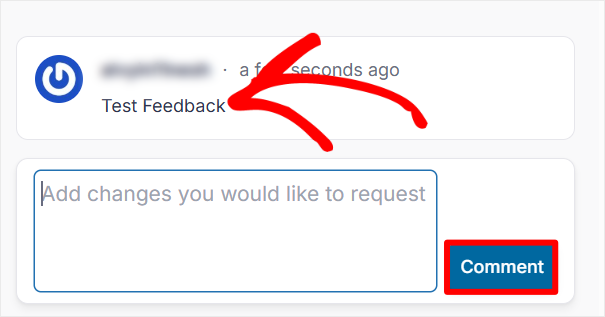
You can also provide real-time feedback on individual social media posts through comments, which really promotes collaboration within your team. It helps everyone learn and improve together.

5. Assign Social Media Accounts: Control Team Access
ClickSocial goes beyond just giving your team different levels of access. It allows you to assign social media accounts to specific team members.
This feature lets you specify exactly which social media accounts each team member can access and work on.
This makes it easy to manage who is responsible for what. It also helps with team specialization. For example, you may have team members who specialize in certain platforms.
Now let us look at documentation and support next.
Documentation & Support
Having all these features is great, but what if you need help or have questions?
That’s where good support and documentation become really important. And with ClickSocial, they seem to have put effort into this area, too.
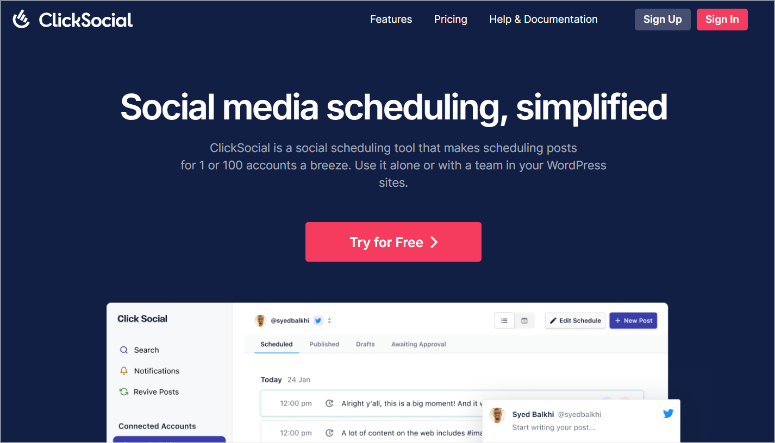
For starters, ClickSocial has a well-organized homepage. Right away, you notice it’s packed with screenshots, quickly showing you how different features work.
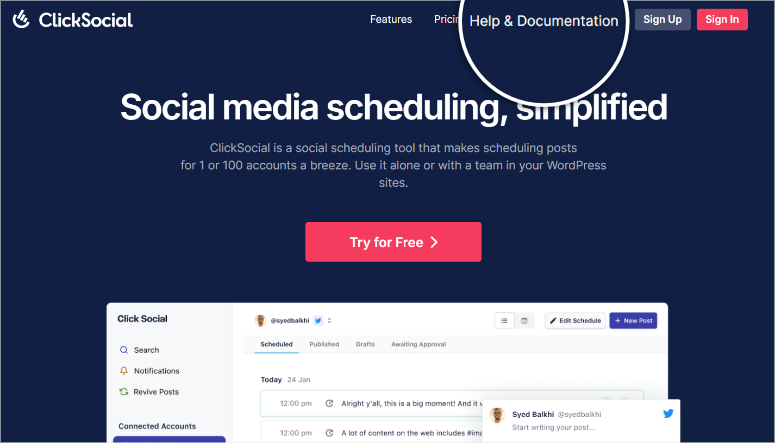
If you need more in-depth information, accessing their documentation is easy. Just look for the “Help & Documentation” link at the top of the homepage. It’s right there at the top of their homepage.

Once you’re on the documentation page, you’ll see it’s neatly divided into tabs, which include Guides, Reference, and Email Support.
You can select any of these tabs to jump straight to that specific documentation section.
Go to:
- Guides: To find detailed tutorials. These guides walk you through exactly how to use all of ClickSocial’s features.
- References: We especially like this resource because it links to posts that explain common issues other users have experienced. It’s great to see solutions and tips based on real user experiences.


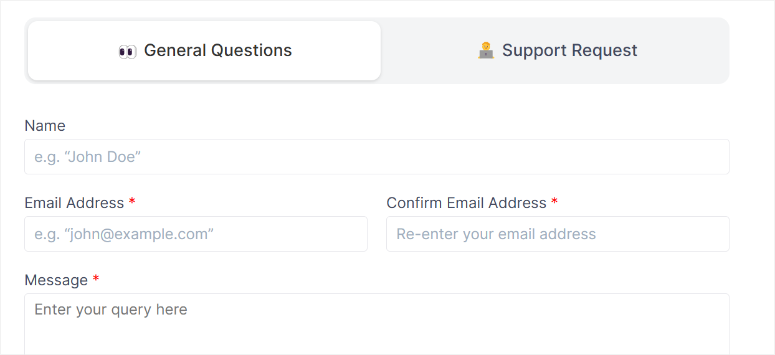
Now, if you can’t find your answer in the documentation, ClickSocial offers two main ways to contact their support team. You can choose between General Questions and Support Request.
If you just have general questions, select “General Questions.”
This channel is perfect for pre-sales inquiries and people who are not ClickSocial customers. You can use this contact form to make general inquiries like pricing, licensing, plugin demo, and more.

But if you’re already a customer and need technical help, you’ll want to go with “Support Request.”
This is the channel for getting technical assistance as a paying ClickSocial customer. The form itself just has two fields: Subject”and “Details.”
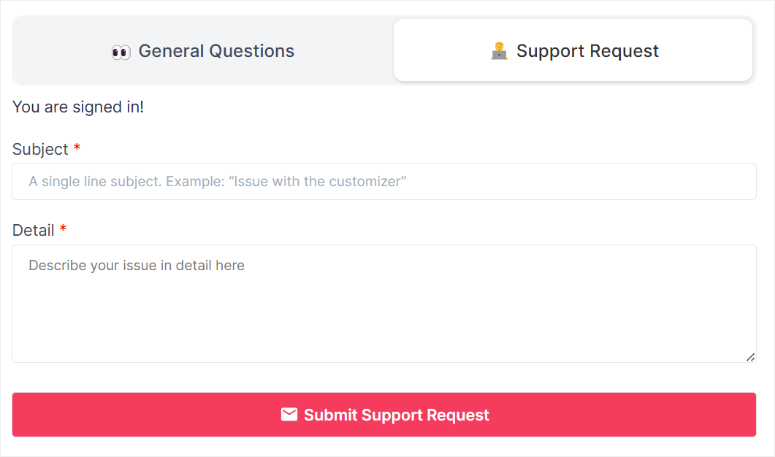

Just fill those out, and you can easily submit your support ticket.
Let us look at pricing now.
Pricing
As mentioned, ClickSocial offers a free plugin version. You can download it directly from the WordPress plugin directory. Keep in mind, though, the free version comes with a limited set of features.
For the full power of ClickSocial, you’ll want to consider their premium plans.
Now, their pricing model is a little different from most plugins. ClickSocial bills you based on the number of social media accounts you want to connect.
You’ll see plus and minus tabs on their pricing page at the top. You can use these to adjust the number of accounts you need.
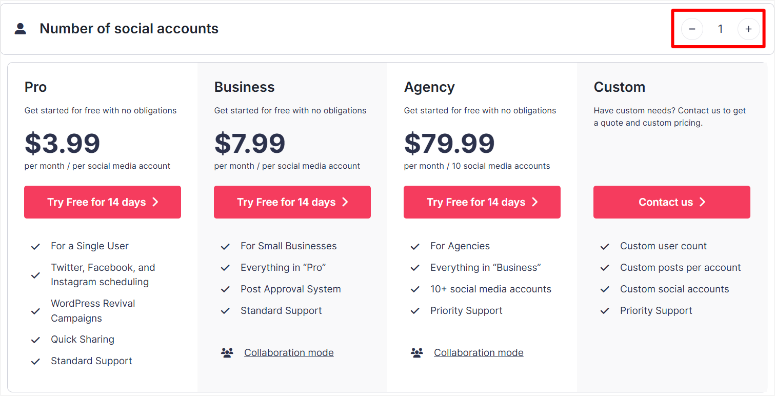

Remember, the more accounts you select, the higher the price. Their base price starts with just one social media account.
- Pro Plan: Starts from $3.99 /Month. This plan is designed for a single user. It includes WordPress Revival Campaigns, Quick Share, and more. Plus, it supports scheduling for Twitter, Facebook, and Instagram. Standard support is also included.
- Business Plan: Starts from $7.99 /Month. This one is aimed at small businesses. It includes everything in the Pro plan. Added to that, it also gives you the Post Approval System for team workflows. You also get standard support with this plan.
- Agency Plan: Starts from $79.99 /Month. This plan is designed for agencies managing multiple clients. It includes everything in the Business Plan. It also supports 10+ social media accounts. You will also get priority support with the Agency Plan.
Finally, they offer a Custom Plan if you have very large or custom needs. For pricing on this, you need to contact the ClickSocial team directly.
The best thing is, each plan comes with a 14-day free trial. This lets you test out the features before you commit.
On top of that, they also offer a 30-day money-back guarantee, no questions asked, with each plan.
Pros & Cons
Let’s break down the pros and cons of ClickSocial based on our time using it.
Pros
- Easy to Get Started: From our experience, setting up ClickSocial was a breeze. The dashboard walkthrough really helped, and connecting our WordPress site and social accounts was very straightforward.
- User-Friendly Dashboard: We found the dashboard to be clean and well-organized. Everything we needed was easy to find, which made navigating ClickSocial a pleasant experience.
- Gutenberg Integration is a Time-Saver: Sharing posts directly from the Gutenberg editor is a huge plus for us. It really streamlined our content workflow and saved us steps when sharing new articles.
- Revive Old Posts is Smart: Revive Posts is a clever way to get more mileage out of older content. It’s an easy way to keep valuable posts in front of our audience without extra effort.
Cons
- Limited Social Media Platforms: We noticed that ClickSocial currently focuses on main platforms like Facebook, X, and Instagram. This might feel a bit limiting if you are heavily invested in other platforms.
- Pricing per Social Account Can Add Up: Depending on how many social media accounts you manage, the pricing structure could become a bit costly compared to tools with a flat fee for unlimited accounts.
FAQs: ClickSocial Review
How much does social media management cost?
Social media management costs vary. Free tools offer a starting point but often lack features. Paid options provide more functionality and support. Prices range from a few dollars monthly, like ClickSocial’s Pro plan, to hundreds, depending on needs. Choosing a tool like ClickSocial depends on the required features and budget.
What is the difference between social media management and marketing?
Social media management involves daily tasks such as scheduling posts and engaging with audiences using tools like ClickSocial. Social media marketing is broader, encompassing strategic planning for goals like brand building. ClickSocial aids in management, supporting overall marketing strategies.
Is there a free social media scheduling tool?
Yes, free social media scheduling tools exist, and ClickSocial offers a free plugin to begin. While helpful, free tools often have limitations. Upgrading to a paid option like ClickSocial for advanced features and scalable management unlocks greater capabilities.
Can ClickSocial help revive old blog posts on social media?
Yes, ClickSocial has a Revive Posts feature. This allows you to automatically re-share older WordPress blog posts on social media. It’s a useful way to bring older content back to your audience’s attention without manual effort and can help increase traffic to older articles.
Does ClickSocial offer team collaboration features?
Yes, ClickSocial includes team collaboration features. They offer options to add team members, set up post approval workflows, and assign social media accounts to specific team members. This makes ClickSocial suitable for businesses and teams that need to manage social media together and maintain brand consistency.
Final Verdict: Is ClickSocial Right for You?
So, is ClickSocial a good social media scheduling and management plugin?
From our experience, it is especially for WordPress users who want something straightforward and easy to use.
ClickSocial shines also when it comes to simplifying social media scheduling right from your WordPress dashboard.
We found the setup process smooth, the interface clean, and features like Gutenberg integration and revive posts genuinely helpful.
If you are looking for a user-friendly plugin to boost your social media presence without the complexity, ClickSocial is definitely worth checking out.
If you are looking for other amazing social media plugins, check out 9 Best Social Proof Plugins for WordPress.
Apart from that, here are other articles you might be interested in reading.
These articles will help you learn how to improve your social media marketing through WordPress.
منبع: https://www.isitwp.com/clicksocial-review/
